For all new stereo pals and anyone who is interested in pursuing 3-D on Instagram and in their daily lives … here’s a brief tutorial from an experienced pal, which I think will be very useful to explain some of the techniques. Let me know how you find it ! OK ?
Bri
—
INSTAGRAM STEREO TUTORIAL
UNDERSTANDING AND CONTROLLING THE STEREO WINDOW
By David W. Kuntz
21 November 2018
There seems to be a bit of mystery surrounding the so called “stereo window.” But, in actuality, it’s easy to understand, and easy to control – especially when using StereoPhoto Maker. But, why bother? Because setting the stereo window correctly will make your images more comfortable to view and appear to have more depth. And, if you like 3D, then more depth is better!
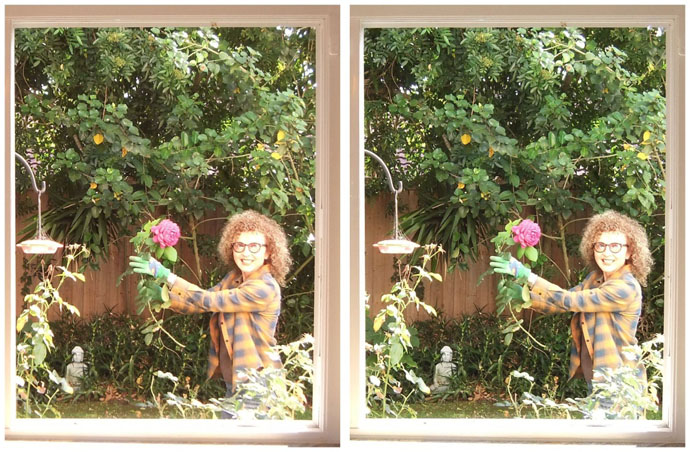
To understand what the stereo window is, let’s look through a real window like in the next photo (which, like all the images here, is set up for parallel free viewing, or viewing through a viewer like the Owl or Owl Lite). Obviously, when we look through a window in real life, everything we see outside appears farther away from us than the window frame itself. Of course, it is possible for something to poke through the window, too, as in the next photo. But, for something to poke through the window, it has to be somewhere within the window, and not cut off by the edge.
To understand what I mean by that last statement, let’s look at a series of images that explore how we perceive depth.
The next image, which has NO 3D, asks a simple question. Yet, even though this image has no 3D, the answer is obvious. The square is closer. We know that because it appears in front of the circle. That is, it blocks off some of our view of the circle (or is “interposed” in front of it). Our visual systems are wired to tell us that when one object blocks off part of another, then that object is closer to us – even in the absence of any other depth cues.
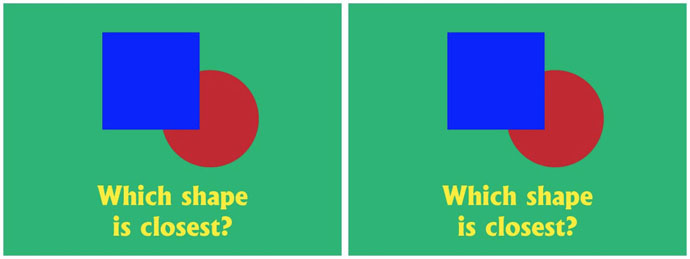
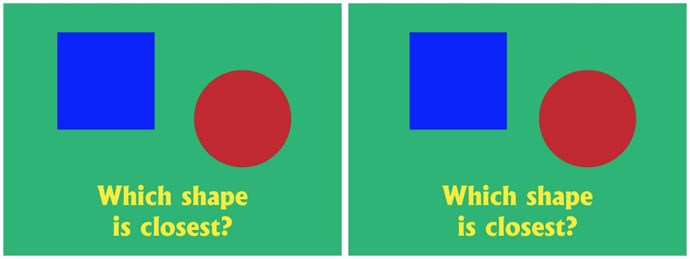
Image 3 The next image asks the same questions again. This time, neither shape blocks off the other. But, in this case, we have 3D depth information (parallax, or stereopsis) that tells us that the red circle is closer.
Besides interposition and stereopsis, there are several other depth cues (like perspective) that our visual systems use. And, in real life, we never run into a situation in which any of these depth cues disagree, or give us conflicting information. But, it is quite possible to create a stereo photo or drawing in which this conflict occurs. That’s just what’s happening in the next image.
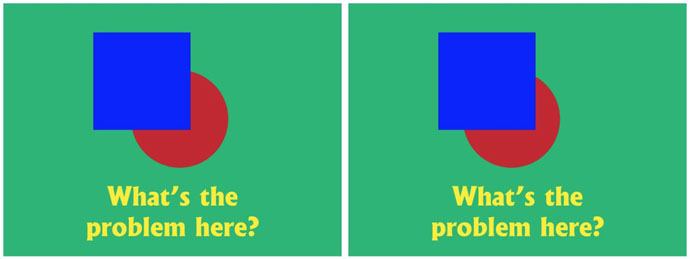
The problem with this image is that the blue square blocks off part of the red circle, which tells our brain that the square is closer to us. But, the stereo 3D information says the opposite, namely, that the red circle is closer. That makes the image look “funny,” that is, not quite right. If you can see the problem in this image, then you have all the skill you need to work with the stereo window.
Just switching the left and right images fixes the problem, as in the next image. Now, the interposition (blocking off) and stereopsis (3D depth) information all agrees, and everything looks fine.
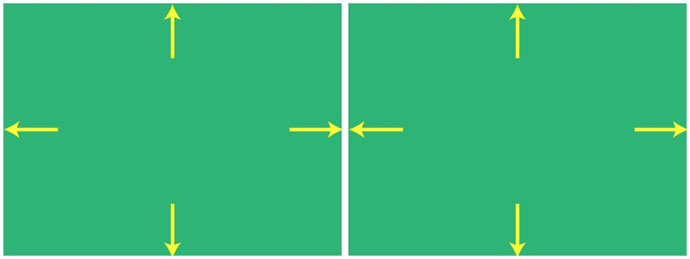
So, what does all this have to do with the stereo window? Well, first of all, let’s define the stereo window as the boundary, or frame, of our image (where the arrows are pointing in the next image). That’s all it is.
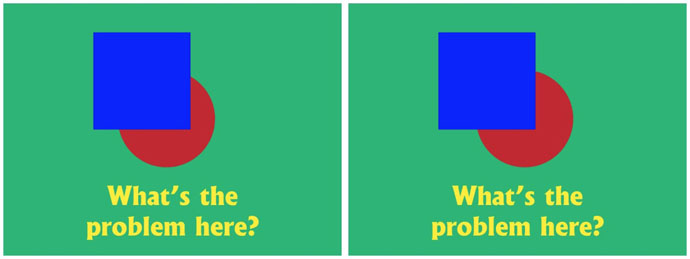
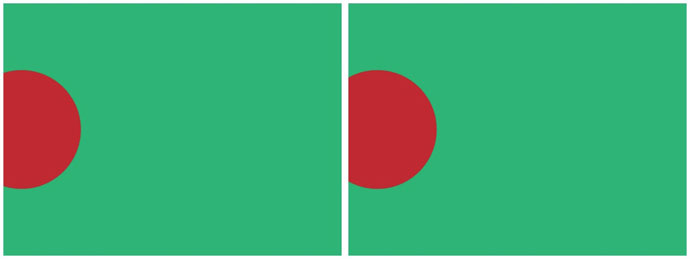
The problem with the stereo window occurs when we have a situation similar to what just happened with the circle and square. In the next image, it’s not an object that blocks off part of the circle, but the edge of the frame itself – or the stereo window – that does. And, the problem here is just like before. Namely, the interposition (blocking off) depth cue tells us the circle is behind the window, while the stereo depth cue tells us that it is in front. So, we end up with the same kind of visual ambiguity and viewing discomfort that we had before.
The next drawing shows the opposite case. Here, the circle appears behind the frame of the image (or stereo window) according to both interposition and stereo depth cues. If you compare these two images, you probably see that something isn’t quite right with the first one – to me it looks like the circle is fighting with the edge of the frame! It’s harder for me to fuse the image, that is, to get it to appear to be a single, 3D image, rather than two separate left and right images. The second one has none of these problems. This is what we want, because it’s easier and more pleasant to view, and makes more sense to our brain.
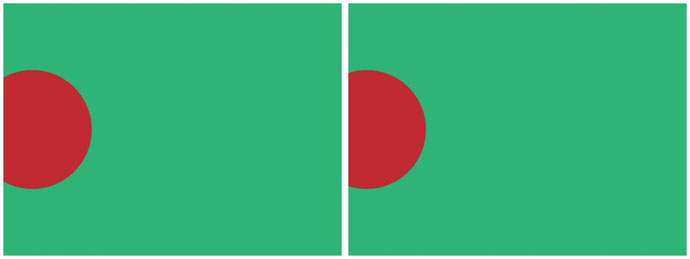
Note that, as mentioned before, objects in our photo can come through the window, if they’re not partially blocked off by the window. This is what we see in the next image. This image is easy to view and causes no problems, even though the circle is coming through the window (appears closer to us than the frame of the picture).

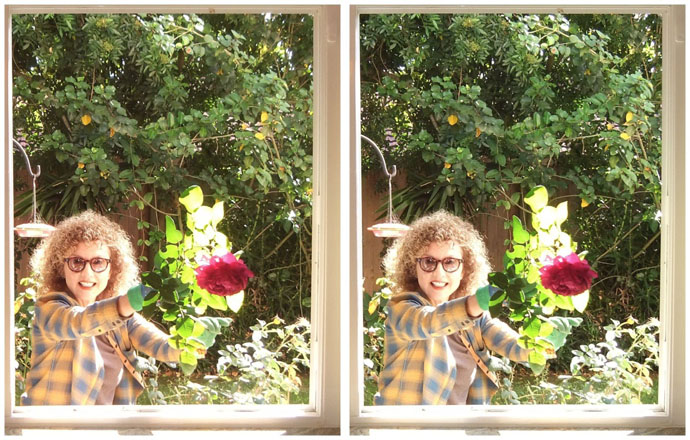
Now, let’s take this out of the realm of drawings, and move into real photos to see how it applies. The next image of the flower has the same problem again. Namely, the petals at the left and right edges of the frame are partially blocked off. So, the stereo depth cues should agree, and tell us that they’re behind the window (frame edge) – but they don’t. The stereo depth information tells us that those petals are in front of the window. This causes a bit of shimmering, especially with the petals on the right side.
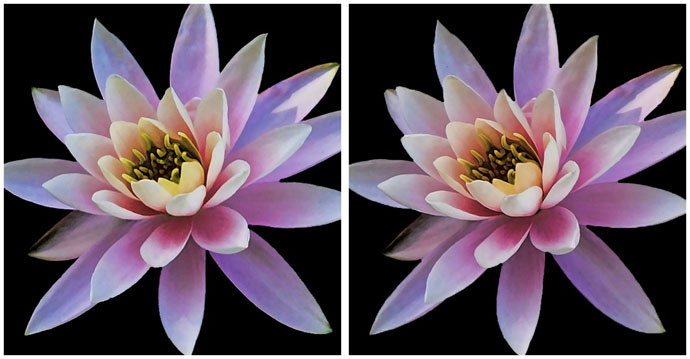
Here’s the exact same image again, except all the flower petals have been moved behind the window. Hopefully, this looks a little more pleasant and easy to view to you.

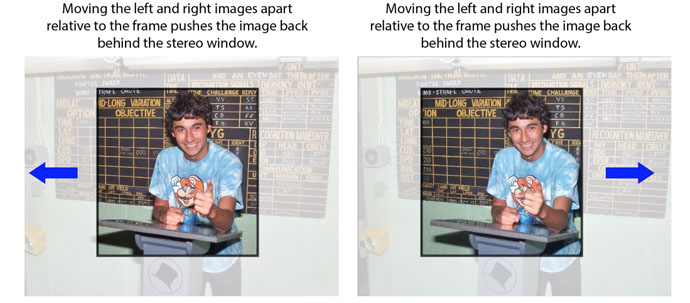
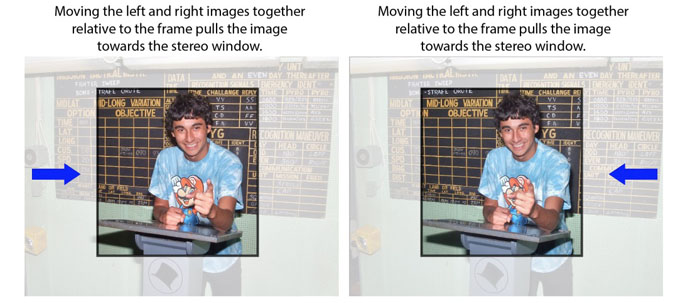
So, how do we adjust the stereo window in order to put it where we want? It’s very simple, and the principle is illustrated in the next two images. Simply stated, if you move the images apart relative to the frame or crop you’re applying, then the subject matter is pushed back behind the window. Conversely, moving the images together relative to the frame or crop brings them forward relative to the window.
Actually performing this adjustment of an image relative to the stereo window is actually incredibly easy, especially in StereoPhoto Maker. Simply using the left and right arrow (cursor ← →) keys moves your photo back and forth (or closer and farther) relative to the window. Specifically, these controls slide the left and right images either apart, or closer together, to make this adjustment.
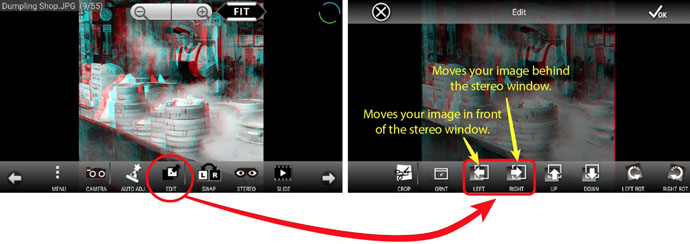
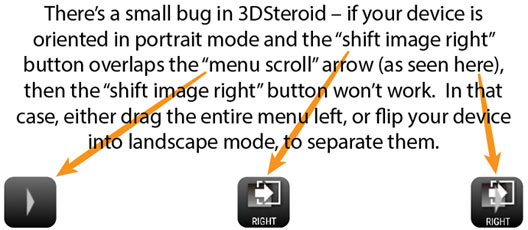
For those using the 3DSteroid app, these left/right movement commands are found in the Edit menu. Specifically, these arrow buttons move the right image (only) relative to the left. When you’re in the 3DSteroid edit mode, you can even just grab the right image and move it with your finger, but this opens up the possibility that you’ll accidentally put in a horizontal misalignment between the left and right images.
Our adjustment goal is usually to put anything in the photo that goes off the edge of the frame behind the window (like the flower petals at left and right in the lotus image).
How do you actually know when you’ve got something behind (or in front) of the window? Well, after you’ve worked with 3D for some time, you may develop the ability to simply see it directly. In other words, you can just look at an image and see that an element appears closer than the edge of the frame (even when it’s positioned behind the frame).
For those that haven’t developed that sense, you can also just compare the relative distance between any part of the composition and its distance to the edge of the frame in the left and right images.
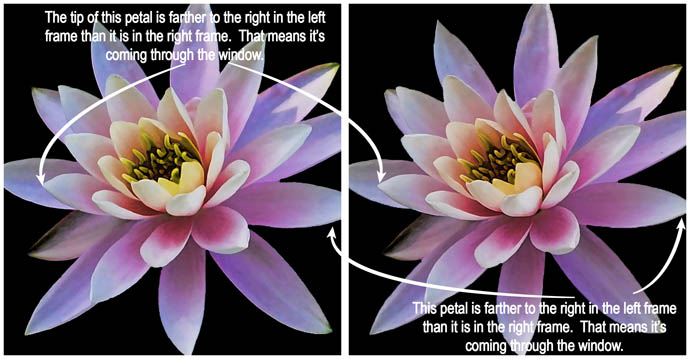
- If the image is arranged for parallel viewing (left image on left), then: If that part of the photo is farther to the right in the left frame than it is in the right frame, then it’s through (in front) of the window. And, “farther to the right” means it’s farther from the left edge of the frame in the left image than it is in the right.
- If that part of the photo is farther to the right in the right frame than it is in the left frame, it’s behind the window. And, “farther to the right” means it’s farther from the left edge of the frame in the right image than it is in the left.
In other words, if an object moves to the right in the right frame (for parallel viewing), then it’s behind the window. That may sound complicated, but it’s not, and the next two photos demonstrate it visually:

To see the visual impact of this let’s look at another example. In the first version of the next image, the railing is coming way through the window. The second version (of the same photo) is adjusted so that the end of the railing, which is the closest thing to us in the photo, is set just at the window. I think the railing looks like it is just slightly curving away in the first image. It appears straight, as it should, in the second, where it doesn’t break the window. Plus, the woman and mountain appear farther away, and the entire image seems to have “more depth” in the second version, in which everything is set behind the window.

Hopefully, this help you to understand what the stereo window is, and how to control it. Keep in mind that the window is set when you’re adjusting the photo in StereoPhoto Maker or 3DSteroid (unless you don’t perform any cropping whatsoever on your photos). The window has nothing to do with your stereo baseline (the separation between the left and right images) which is set the moment you have taken your photo, and can never be subsequently changed.
PLEASE OBSERVE COPYRIGHT
© brianmay.com